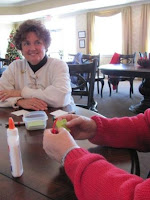
You would like to try these, I think.
A wee bit of origami folding, a bit of gluing and tah-dah!

 You'll need to be ready to make a bit of a mess. You'll need paper cut into 3" to 4" squares. (I used drawing paper. It's nice and white and a good weight to work with.) We used 3" squares, making the finished product a little more delicate looking.
You'll need colored cardstock (if you visit a scrapbooking store or craft department, you'll find some nice pieces), narrow ribbon and beads. Colored "pony" beads are nice, but beads used for jewelry (with larger holes in the center) are also very pretty.
Each little book takes three pieces of pre-cut paper.
1) Fold the paper in half, matching top edges and corners as perfectly as possible. Sharply crease the fold.


2) Unfold, turn your paper so your crease runs vertically and fold your paper in half again, matching the top edges and corners and creasing sharply. Unfold. Your paper looks as though it's been divided into quarters.
3) This time fold your paper into a triangle, matching the corner and two edges as perfectly as possible. Crease very well - you can even flip the triangle over and crease the back side as well.


4) Notice in this second photo, I've taken the creases (the mountain-folds) and pushed them down to make "valley folds." Each side section will be pushed behind and between the front (and back) little square sections of paper.
You'll end up with a paper that looks like these below. Do this same procedure to each of the three papers. Each of these will create a page of your book.


5) Your next step will be to decide the shape of your pages.
Below shows the shape I'm making mine.
Your first page will be your pattern for the other two,
as well as the pattern for the front and back covers.
Below shows the shape I'm making mine.
Your first page will be your pattern for the other two,
as well as the pattern for the front and back covers.
(Perhaps you can discern other shape ideas as you see the finished books further along in this post.)

6) What ribbon will you use? And what paper will you use for your covers?


7) In the first photo below, you will see my three folded pages and two covers. This is important before you glue: Make sure the pages line up, so that the front of each page is facing you. The back of the first page will be glued to the front of the second page. The back of the second page will be glued to the front of the third page. Use the glue very sparingly. Even the tiniest bit of glue sometimes escapes and will stick the pages together, so don't wait too terribly long to open them... just in case you need to separate the parts of each page.


The first photo below shows the glued pages. You have glued them so the center of the pages are all together. I am holding the center below.
8) Next, place a thin line of glue from the center to the outer tip of the top page. This is where you'll glue one of your ribbons.


9) Next you'll glue (again, sparingly) the entire top of the book and set the book cover in place.
repeat with the back of the book. First the ribbon, and then the cover.


10) Open gently to separate any pages (or half pages) that might be stuck with a little glue.


11) Slide a bead on your ribbons. Push it down to keep the book closed for the moment. Tie a good knot in the end of the ribbons . This ribbon will hang the book on your Christmas tree (and the knot will keep the bead on your ribbons!)


At this point, you might decide to decorate the exterior of your little book. Or you might just write something like, "Christmas 2009" on it. :-)
Some of my friends and I had a couple of workshops. The photo below shows three of us (when I finally remembered to take photos) with a finished product.


Here are some of my neighbors. We worked a bit last night and ended up with some great ornament books!


Tah-dah!

Here are a few that are on my tree.


 Yes, you can write in the them. It was easier for me (!) to finish the book, let it dry, lay it out on the table and open one set of pages at a time for the writing inside. It's fun to find a little saying or inspirational piece.
Believe it or not, I've had a number of little workshops this past week or so. I missed pictures of several of my friends - my wits were not about me! But we each ended up with some great ornament books... and hopefully some good Christmas 2009 memories, to boot! :-)
Last Year's (2008) Ornament were Christmas Angels. Click here to read the post.
In 2007, some of us created wire and bead stars.

Maybe next year you'd like to join us too! :-)


